

Today I'm going to show you all a fifth grade woodworking project. Ha! Not really. But as I was working on this particular project that is totally how I felt. But hey, regardless of whether or not this is a school project a ten year old would do, I never got to do any cool woodworking stuff when I was a kid (so unfair, right?). When I was younger I was a girly girl, for sure, glittery pink unicorns oh my (some things never change ;). I was also in Girl Scouts for years but I don't remember us dabbling with wood and tools. I just remember doing tons of crafty projects, oh, and cookies, lots and lots of cookies...
Ok enough about my misspent youth ;). Today I'm giving you all a quick tutorial on how to make a rustic tabletop trough. I've wanted to make one for quite some time now, I was just waiting for the perfect wood to fall into my lap. A good amount of free fence pickets that look like barn wood became all mine as you know if you read my previous post on a DIY reclaimed wood frame on a builders grade mirror. So of course that would naturally be the wood I would use for my trough.
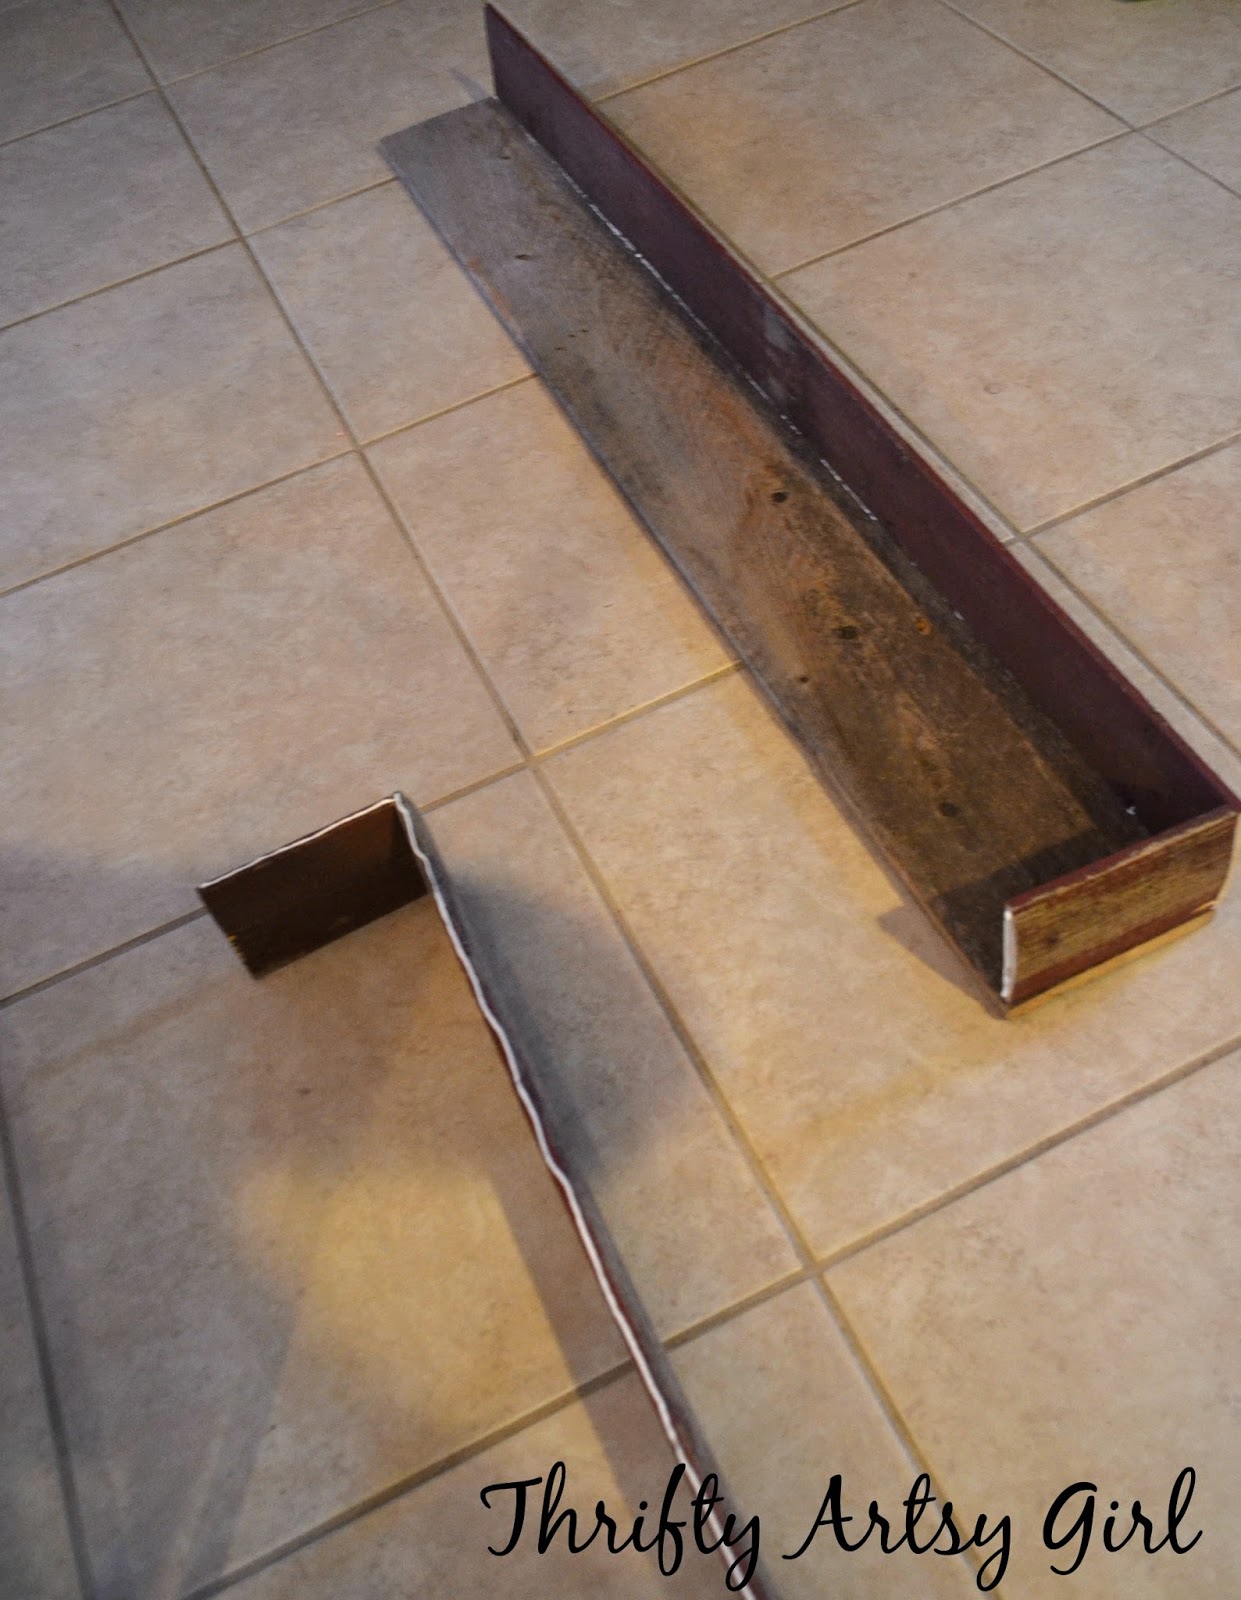
Cory had found me a wide wood piece that had been a part of the fence gate. I figured it would be perfect for the base/bottom of my trough. I trimmed it up so that the edges were flat. I hemmed and hawed about putting the frame of the trough over the base piece (covering it) or on top of it (letting the bottom wood show). In the end I decided I wanted a taller trough and it would look more like the farmhouse rustic look I was going for if I constructed the frame on top of the bottom piece of wood.

I then cut two pickets to that same length for the sides. Then I cut two little end pieces to the width of the bottom piece of wood minus the longer side board end pieces so the little pieces essentially slipped in between the long pieces. I only did this because I wanted the ends of the long pieces to show next to the small pieces, again I was going for the most rustic look possible. My boards were by no means perfect since they not only had been outside in the elements for years giving them a slightly warped, not so straight and perfect look but I also have the cutting and measuring skills of a ten year old (just kidding ;) I'm getting the hang of it!).

Now I was on to construction. I hand nailed a couple nails to attach the long side pieces to the small end pieces. I had planned on just gluing the whole thing together with no nails because I wanted to keep it very rustic, that and I don't have a nail gun (it would make a great Christmas present ;) hint, hint, wink, wink) but I figured the nails would help hold the frame together and provide a little stability while the glue dried.


After hammering nails (which by the way made the wood look even more rustic when my sad, non-straight hand nailing skills chipped off some wood) it was on to gluing. I used liquid nails glue and frog tape (my new fave tape) to hold everything together.

I put a thin bead of glue on all the connecting spots, pressed it all together and taped all over the place to keep the joints tight while drying. I flipped the trough over onto the top and placed some heavy objects on the base to further hold the wood together.


Throughout the entire process Cory voiced his doubts about the construction of my trough holding up. I did not let it faze me. The trough was not going to be holding boulders, or used as a toddler toy box, farm animals were not going to be eating out of it, it was purely for decoration. It was literally going to sit there and look pretty. I saw no need to make it hurricane resistant. I definitely appreciated his input but I was going for form over function.
The true test to see if my amateur construction skills worked would be to see if my trough held together after the glue dried. I let the trough dry all day and then flipped it over. It held together! I took the tape off. It held together! I picked the trough up and set it on the table. It seemed very stable. I even tried to move the wood and it wasn't budging. Yay! It worked!
Here's some pics of the finished trough. I put in some mini pumpkins, a light up leaf garland I got for $1 at Walmart on clearance and some of my wax paper leaves to fill her up. I got my trough done just in time for Thanksgiving so I can use it as a centerpiece to decorate my Thanksgiving table :).


Since this is my last "fall" post I'll share with you all one of my other crafty fall projects, a stained and stenciled crate I used to hold a mum on the front porch :).


Obviously these pics were taken around Halloween, before the weather turned cold and before I killed that poor mum with my black thumb.
I also stenciled a North Pole crate for our elf on the shelf, Oso (yep, Jackson named him), for his arrival on our front porch on Thanksgiving night. We started the elf on the shelf tradition last year when Jackson was 2 1/2 and it really was fun stashing him in crazy places and positions and it added some magic to our holiday ;).

I used a couple of different sized circles and triangles I found in my stencils to make the compass since free handing a perfect circle is not one of my better talents.

I killed two birds with one stone with this crate by using it for Oso to show up in and for a Christmas decoration. I'll definitely be stashing it somewhere with maybe some greenery, ornaments and battery operated lights to add to my holiday decor.


I used a couple of different sized circles and triangles I found in my stencils to make the compass since free handing a perfect circle is not one of my better talents.


Hope you all have a happy Thanksgiving with your family and friends!! XOXO!
A Christmas post that I have been planning since this past summer is up next!


No comments:
Post a Comment